New PB for Liz Anelli and Pamela Freeman

Congratulations to Illustrator Liz Anelli and Author Pamela Freeman on the publication of

Seed to Sky  Life in the Daintree

a hardback non fiction picture book for ages 4+ published by Walker Books Australia

03 April 2024

From the award-winning creators of 'Desert Lake' and 'Dry to Dry', a spectacular two-century journey into the Daintreee rainforest, and the life cycle of the extraordinary Bull Kauri Pine.

In the oldest rainforest on Earth, a seed falls to the ground. Slowly, it grows, reaching towards sunlight, to become a towering tree. Generations of insects, butterflies, bird, lizards, snakes and an abundance of native wildlife bear witness.

Book Launch - At Newcastle Writers Festival on Saturday April 6th 10.30 -11.30am at The Press Book House 462 Hunter Street Newcastle 2300 NSW. See here to book

What a fantastic book!

Photoshop Tips By Liz Anelli

My illustration work relies heavily on drawing and I have found over the years that I can lose line quality and vivacity if I try to recreate a drawing ‘in best’.

So nowadays I mostly now use the original drawings. But these usually need to be tinkered with.

Photoshop is like driving a car. There’s loads of stuff under the bonnet and I don’t even know what most of it called - but that doesn’t matter because all I want to do is go for a drive. There are also many different ways of driving – and possibly all of them are correct.

Here is one way of removing background from a drawing so that you can use it as the line layer for your artwork.

1. Scan in Greyscale.

Photoshop Tips By Liz Anelli_v2 1.jpg

2. I always duplicate that layer – so if I mess it up I still have the original.

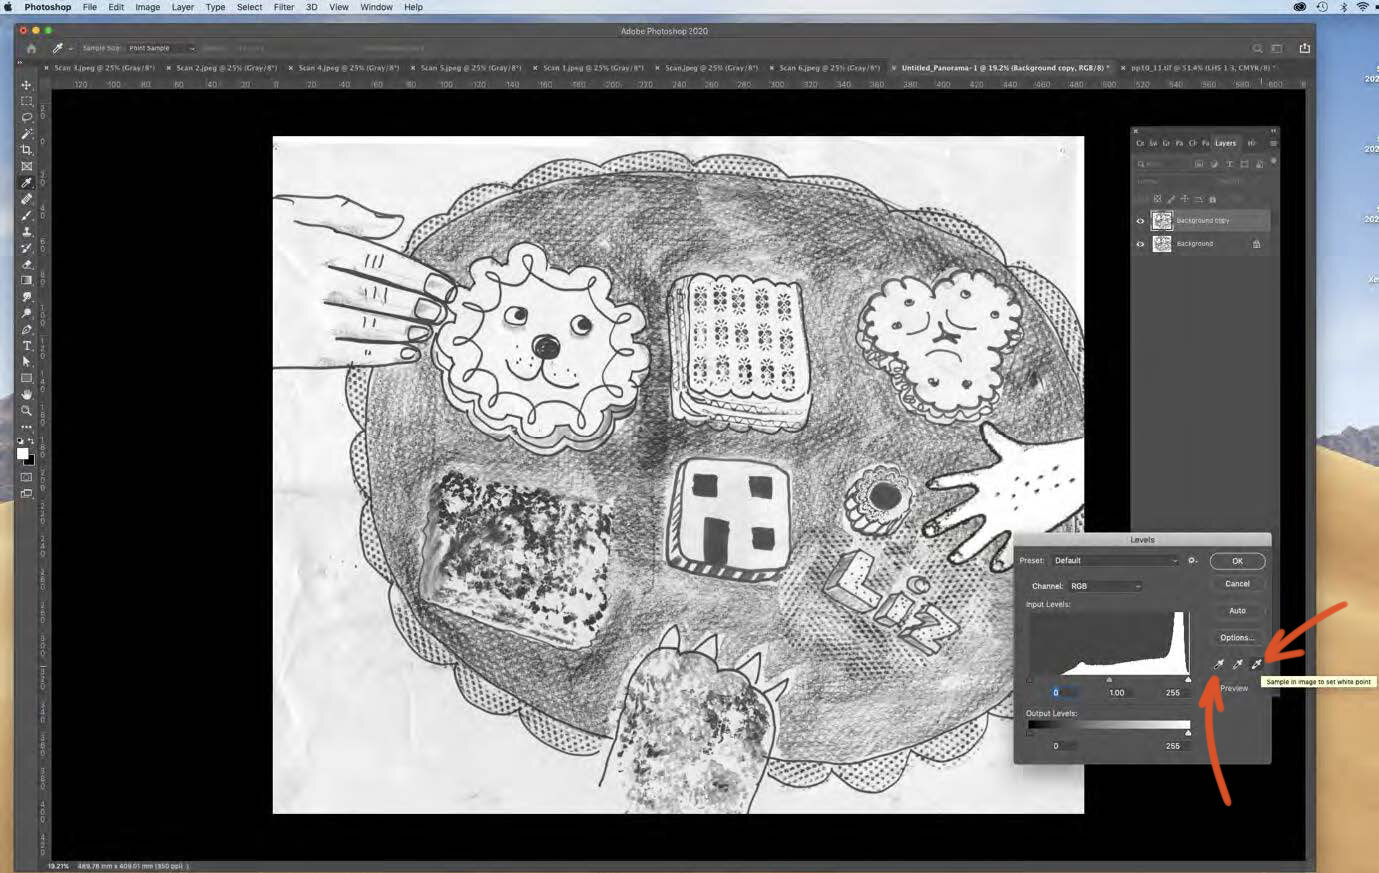
3. Then from top menu bar select: Image > Adjustment > Levels

4. Use the eye droppers to decide on values for the whitest (the ‘white point’ = far right dropper) and the blackest (the ‘black point’ = left dropper) areas – so that you have plenty of contrast. It’s worth experimenting with this stage to get more or less graininess and texture.

Photoshop Tips By Liz Anelli_v2 2 copy.jpg

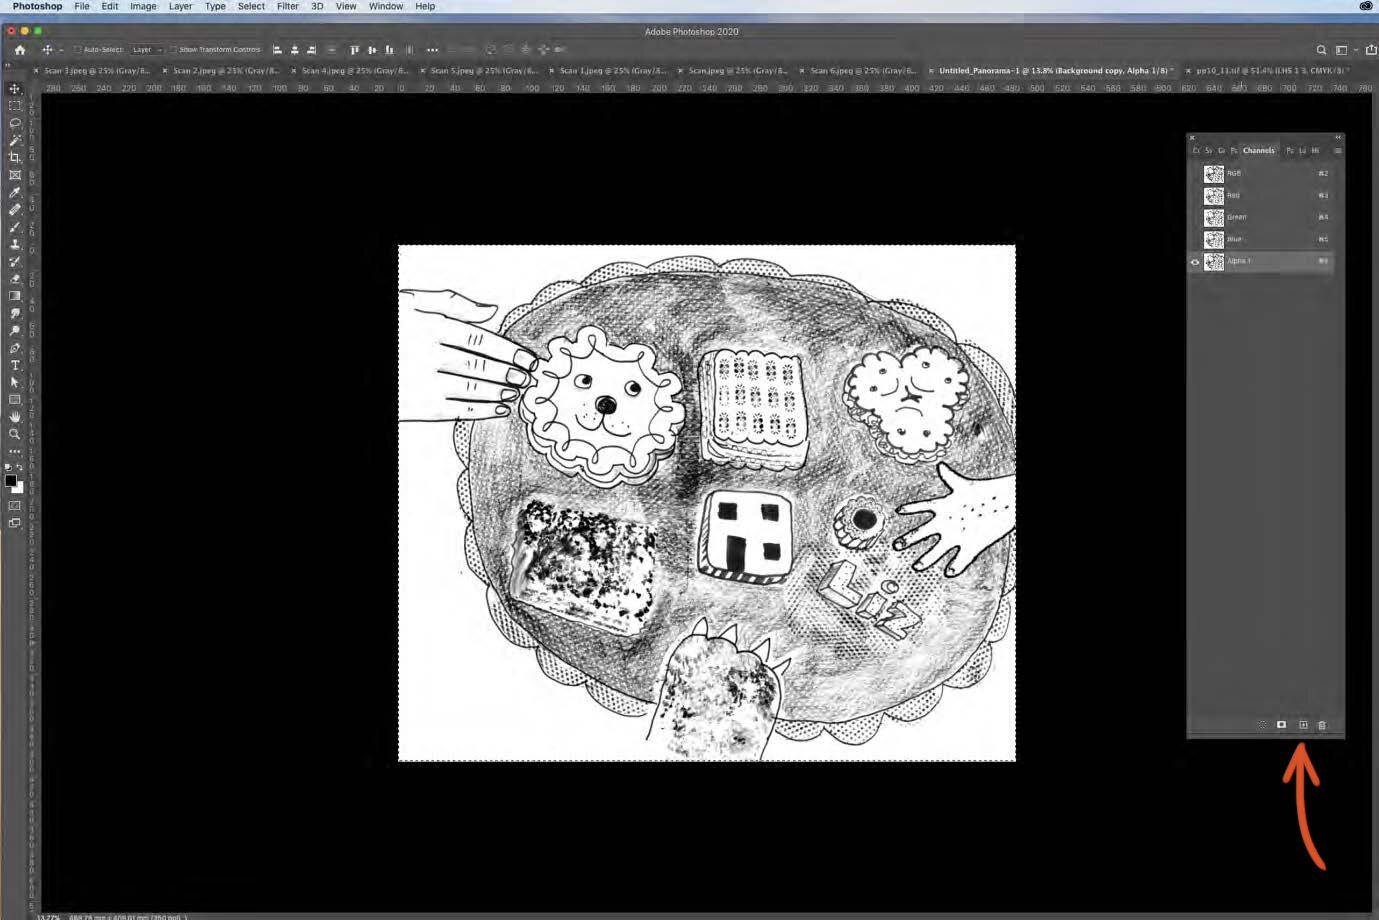
5. Select the whole image and make it a channel.

Photoshop Tips By Liz Anelli_v2 5 copy.jpg

6. Then Invert the image in this new channel (command + i).

7. Load the selection (the little circle at the bottom of the channel box).

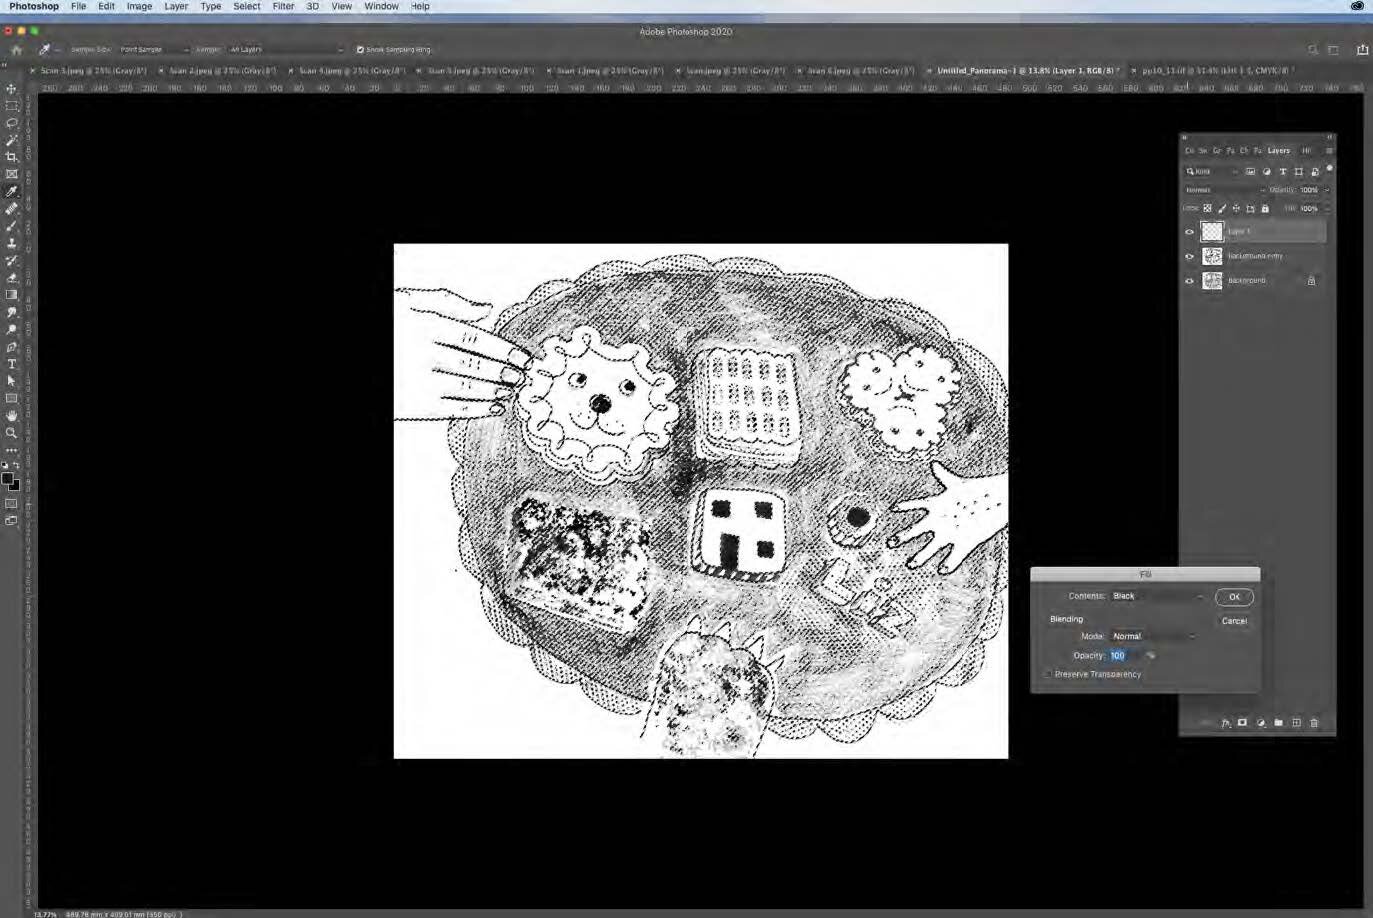
8. Go to your Layers > open a NEW layer > Edit > Fill that layer in black… and Ta Dah … you have your drawing in black line all by itself, complete with all the lovely texture of your pencil drawing/print/collage.

Photoshop Tips By Liz Anelli_v2 8.jpg
Photoshop Tips By Liz Anelli_v2 9.jpg

9. It’s a good idea to rename that layer ‘Line’…

Photoshop Tips By Liz Anelli_v2 10.jpg

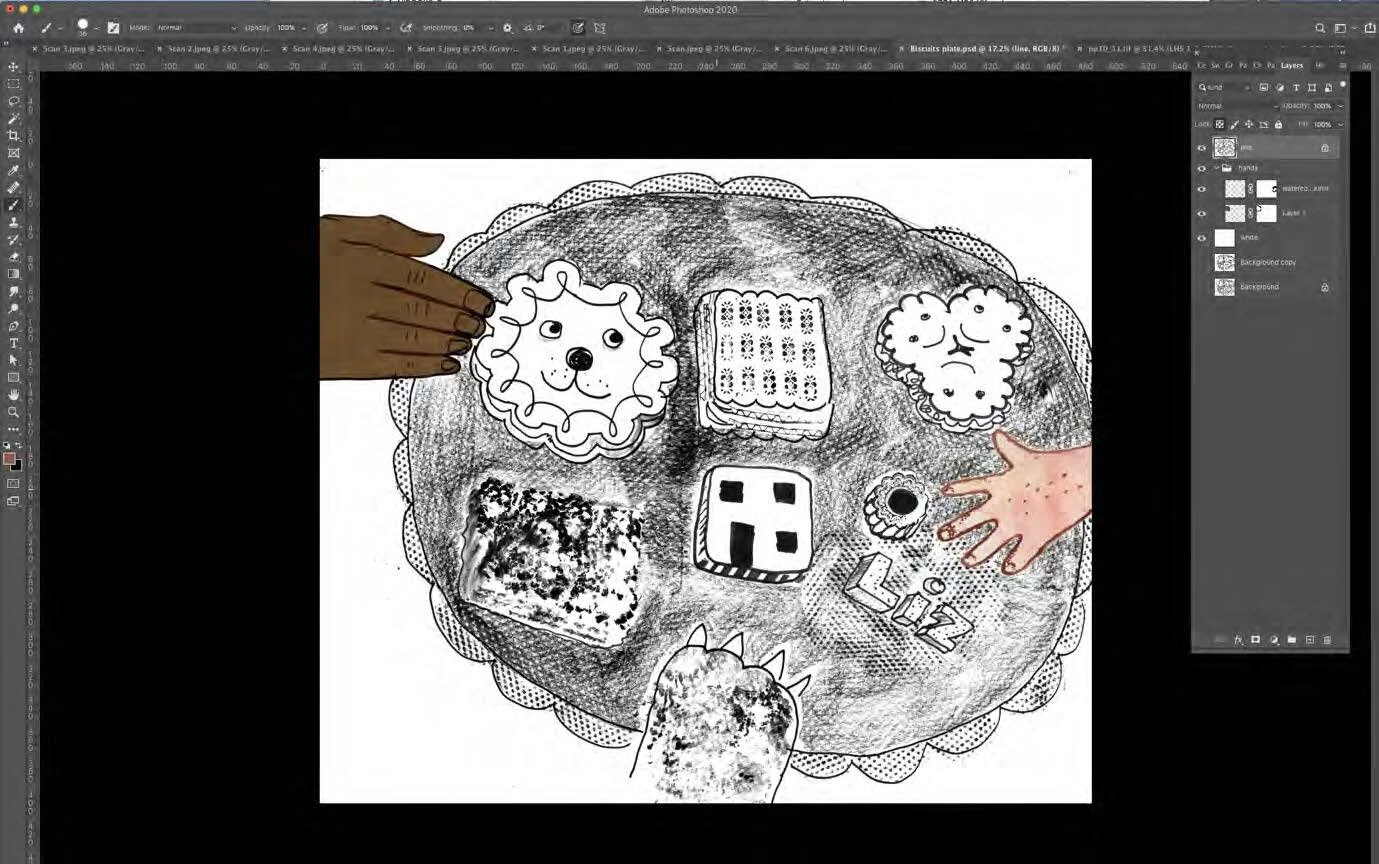
10. …and to add another layer underneath called ‘white’ that is filled with white. This makes it much easier to see what you’re doing as you work on the line layer.

11. Locking the line layer means you can colour just the line using the brush tool. The rest is really transparent … it only looks white here because of that White layer underneath.

Photoshop Tips By Liz Anelli_v2 11 copy.jpg

12. I bring in scanned in collage/ paint or use the photoshop colours underneath the line layer.

Photoshop Tips By Liz Anelli_v2 12.jpg
Photoshop Tips By Liz Anelli_v2 13.jpg

13. You can have as many line layers as you like… bringing it separate bits of drawing.

14. Just remember to lock the layer if you want to colour ONLY the line

Photoshop Tips By Liz Anelli_v2 14.jpg
Photoshop Tips By Liz Anelli_v2 15.jpg